> ## Documentation Index
> Fetch the complete documentation index at: https://docs.honeyhive.ai/llms.txt
> Use this file to discover all available pages before exploring further.
# Annotation Queues
> Learn how to create and manage annotation queues for human review and labeling.
Annotation Queues in HoneyHive allow you to organize and manage events that require human review, labeling, or quality assessment. They provide a automated workflow for routing specific events to your team for annotation.
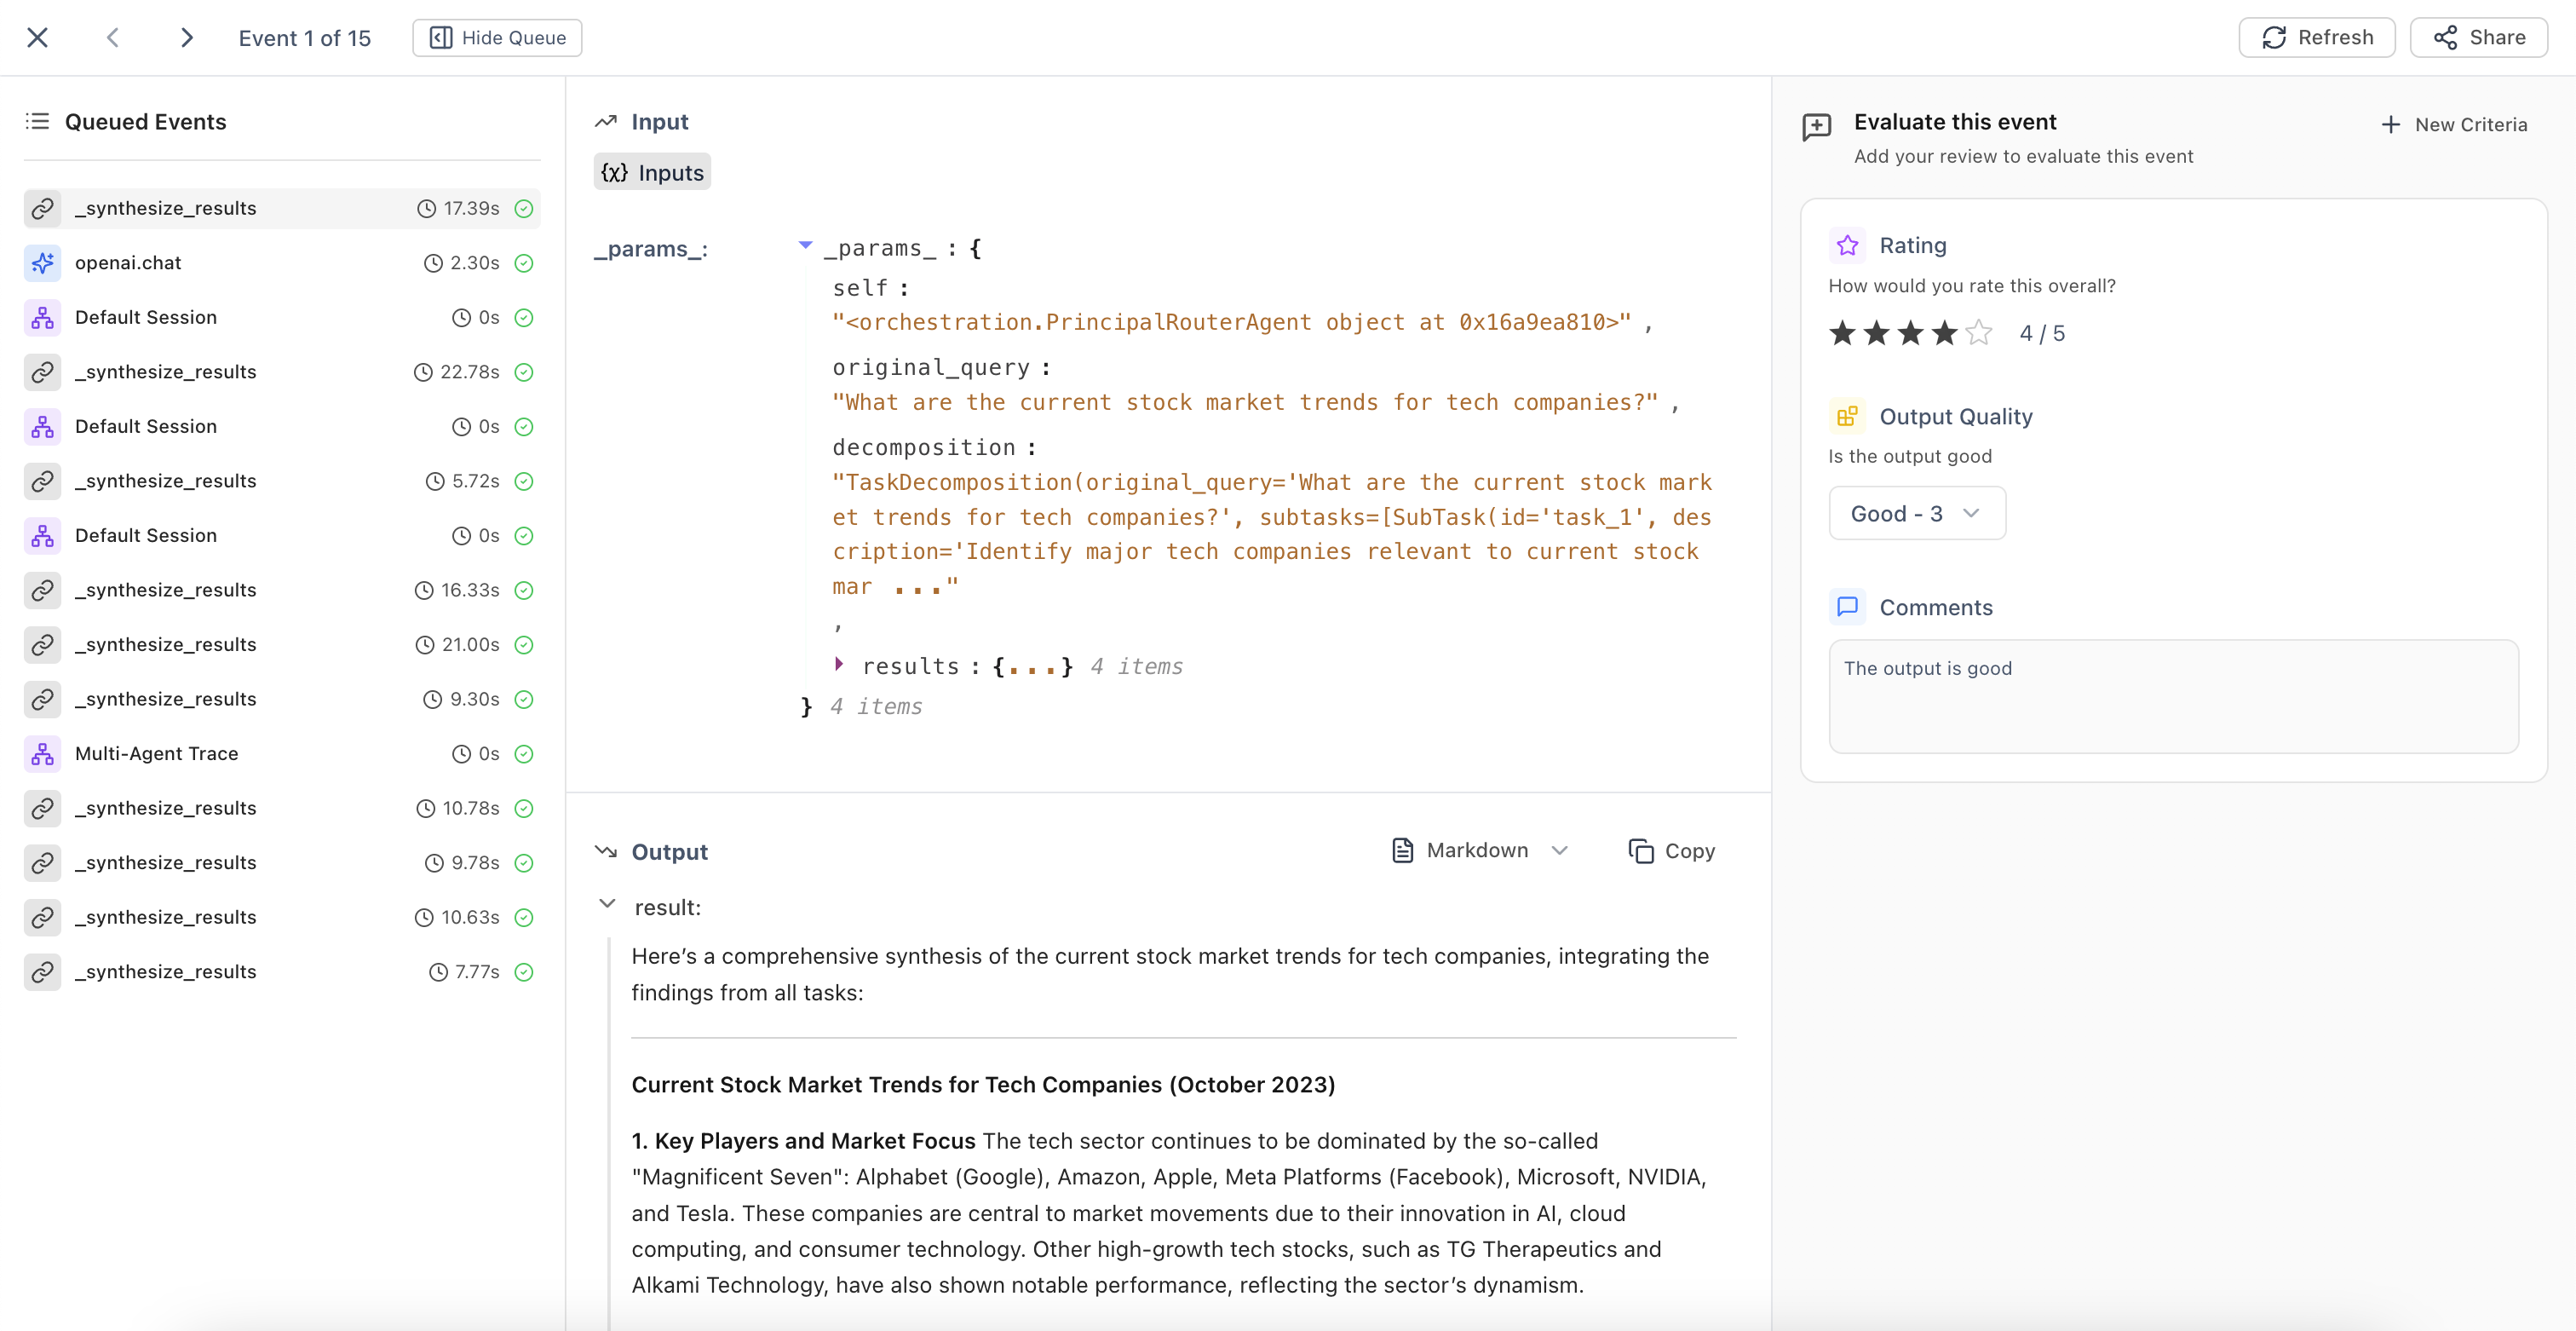 ## Setting Up Annotation Queues
There are two ways to set up annotation queues: manually adding events or setting up automated rules.
### Manual Queue Creation
To manually add events to an annotation queue:
1. Navigate to the **Log Store** in your project
2. Apply filters to identify the events you want to add to the queue
3. Select the events you want to include (you can select all matching events)
4. Click the **Add to** dropdown menu
5. Select **Add to Queue**
## Setting Up Annotation Queues
There are two ways to set up annotation queues: manually adding events or setting up automated rules.
### Manual Queue Creation
To manually add events to an annotation queue:
1. Navigate to the **Log Store** in your project
2. Apply filters to identify the events you want to add to the queue
3. Select the events you want to include (you can select all matching events)
4. Click the **Add to** dropdown menu
5. Select **Add to Queue**
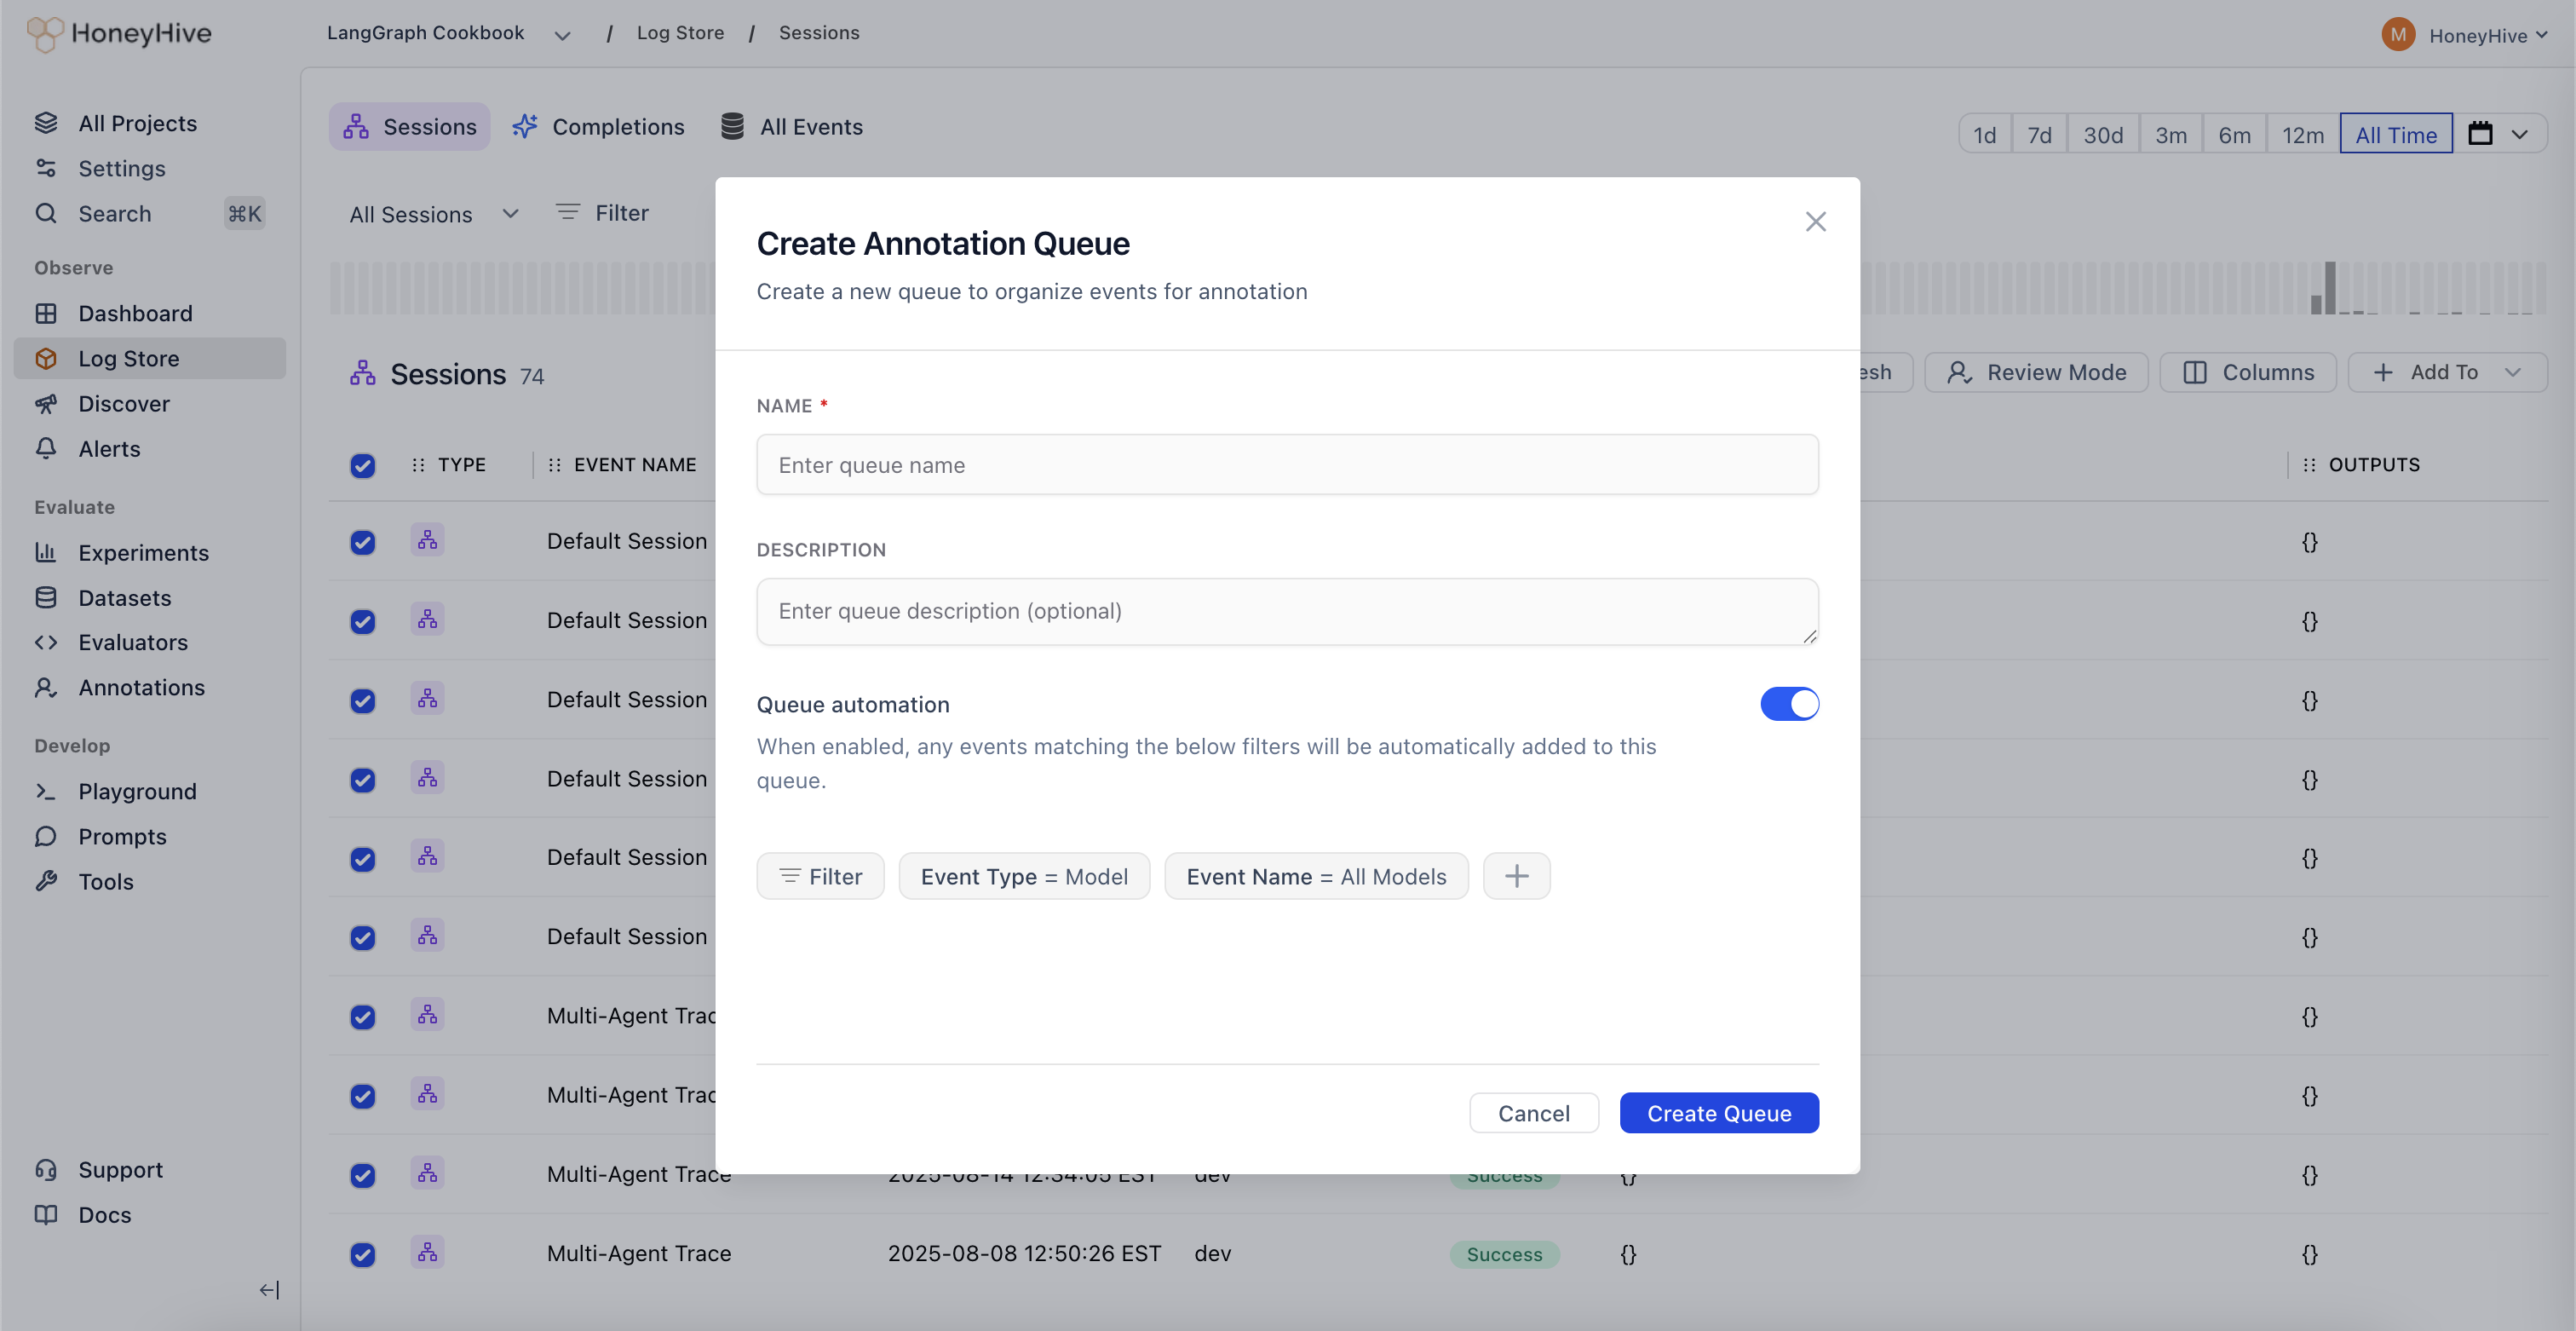 This approach is useful when you want to curate a specific set of events for review or when dealing with edge cases that need immediate attention.
### Automated Queue Creation
For continuous annotation workflows, you can set up automation rules that automatically add matching events to a queue:
#### Option 1: During Manual Selection
1. Follow the manual queue creation steps above
2. After applying your filters but before adding to queue, ensure your filter criteria are set
3. When creating, toggle the **Queue automation** checkbox
4. Your filters will be saved as automation rules
#### Option 2: From Annotations Tab
1. Navigate to the **Annotations** tab in your project
2. Click **Create Queue**
3. Set up your filter criteria to define which events should be automatically added
4. Toggle the **Queue automation** checkbox
5. Save your queue configuration
With automation enabled, any new events matching your filter criteria will be automatically added to the queue, ensuring continuous coverage without manual intervention.
## Use Cases
Annotation queues are particularly useful for:
* **Quality Assurance:** Route low-confidence predictions or edge cases for human review
* **Active Learning:** Identify and label examples where your model is uncertain
* **Compliance Review:** Flag sensitive or regulated content for manual verification
* **Training Data Curation:** Collect and label examples to improve your datasets
* **Performance Monitoring:** Sample production traffic for ongoing quality assessment
## Next Steps
Learn how to create human evaluator fields with custom criteria for your annotation workflows
This approach is useful when you want to curate a specific set of events for review or when dealing with edge cases that need immediate attention.
### Automated Queue Creation
For continuous annotation workflows, you can set up automation rules that automatically add matching events to a queue:
#### Option 1: During Manual Selection
1. Follow the manual queue creation steps above
2. After applying your filters but before adding to queue, ensure your filter criteria are set
3. When creating, toggle the **Queue automation** checkbox
4. Your filters will be saved as automation rules
#### Option 2: From Annotations Tab
1. Navigate to the **Annotations** tab in your project
2. Click **Create Queue**
3. Set up your filter criteria to define which events should be automatically added
4. Toggle the **Queue automation** checkbox
5. Save your queue configuration
With automation enabled, any new events matching your filter criteria will be automatically added to the queue, ensuring continuous coverage without manual intervention.
## Use Cases
Annotation queues are particularly useful for:
* **Quality Assurance:** Route low-confidence predictions or edge cases for human review
* **Active Learning:** Identify and label examples where your model is uncertain
* **Compliance Review:** Flag sensitive or regulated content for manual verification
* **Training Data Curation:** Collect and label examples to improve your datasets
* **Performance Monitoring:** Sample production traffic for ongoing quality assessment
## Next Steps
Learn how to create human evaluator fields with custom criteria for your annotation workflows