> ## Documentation Index
> Fetch the complete documentation index at: https://docs.honeyhive.ai/llms.txt
> Use this file to discover all available pages before exploring further.
# Managing Prompts
> Test, version and manage your prompts in the Studio.
Playground is a scratch pad to quickly iterate on prompts & "vibe-check" models.
In this guide, you'll learn how to make the most of the HoneyHive Playground, where you can experiment with new prompts, models, OpenAI functions and external tools.
HoneyHive allows you to define, version and manage your prompt templates and model configurations within each project.
A prompt-model configuration refers to a combination of prompt, model and hyperparameter settings unique to a particular version. Throughout our docs, we may use the term "config" or "prompt configuration" to refer to a prompt-model configuration.
### What is the Playground?
The Playground is a UI that connects with your LLMs wherever they are hosted & allows you to quickly iterate on prompts built on top of them.
The way it calls your LLM provider is
1. We ask you to configure your provider secrets (that are encrypted & stored in your browser cache)
2. Based on the parameters & prompt specified in the UI, we craft an API request for your provider
3. We pass the secrets & the request to our proxy service which pings your provider
We trace cost, latency & calculate evaluators automatically on all requests from our proxy.
4. If the request was successful, we stream or print the response in the UI
5. If the request was unsuccessful, we show a full error description provided by the provider
To get started with the Playground, we will start by configuring a model provider.
### Configure a model provider
**Expected Time**: Few minutes
**Steps**
**Next Steps**
Congratulations, now you are ready to create prompts on top of your models in HoneyHive.
### Create your first prompt
**Expected time**: Few minutes
In the following tutorial, we use `AI Q&A bot` as the project, you can pick any project you want to create your prompt in instead.
HoneyHive uses `{{` and `}}` to denote a dynamic insertion field for a prompt. Dynamic variables are typically useful when inserting inputs from end-users or external context from tools such as vector databases.
### Version Management
Our first prompts are often simple prototypes that we end up changing very often.
1. HoneyHive automatically versions your prompts as you edit your prompt template and test new scenarios.
2. A new version is only created automatically when you run a test case against your edited prompt.
While HoneyHive automatically creates new versions as you iterate, you will need to give your version a name and click `Save` in order to save it as a prompt-model configuration.
### Iterating on a saved prompt
Our Playground support easy forking & saving to track variants you like while you keep changing the prompt.
**Expected time:** few minutes
**Steps**
### Open a prompt from a previous run
If you want to go back to a prompt you had already run, or open one from a trace that was logged externally, then you can simply click “Open In Playground” from that run’s view.
**Expected time**: few minutes
**Steps**
### Sharing and Collaboration
To share a saved prompt, simply press the `Share` button on the top right of the Playground.
This will copy a link to the saved prompt that you can share with your teammates.
### Using OpenAI Functions
1. Navigate to [**Tools**](https://app.us.honeyhive.ai/studio/tools) in the left sidebar.
2. Click `Add Tool` and select `OpenAI functions`.
3. Define your OpenAI function in a JSON format.
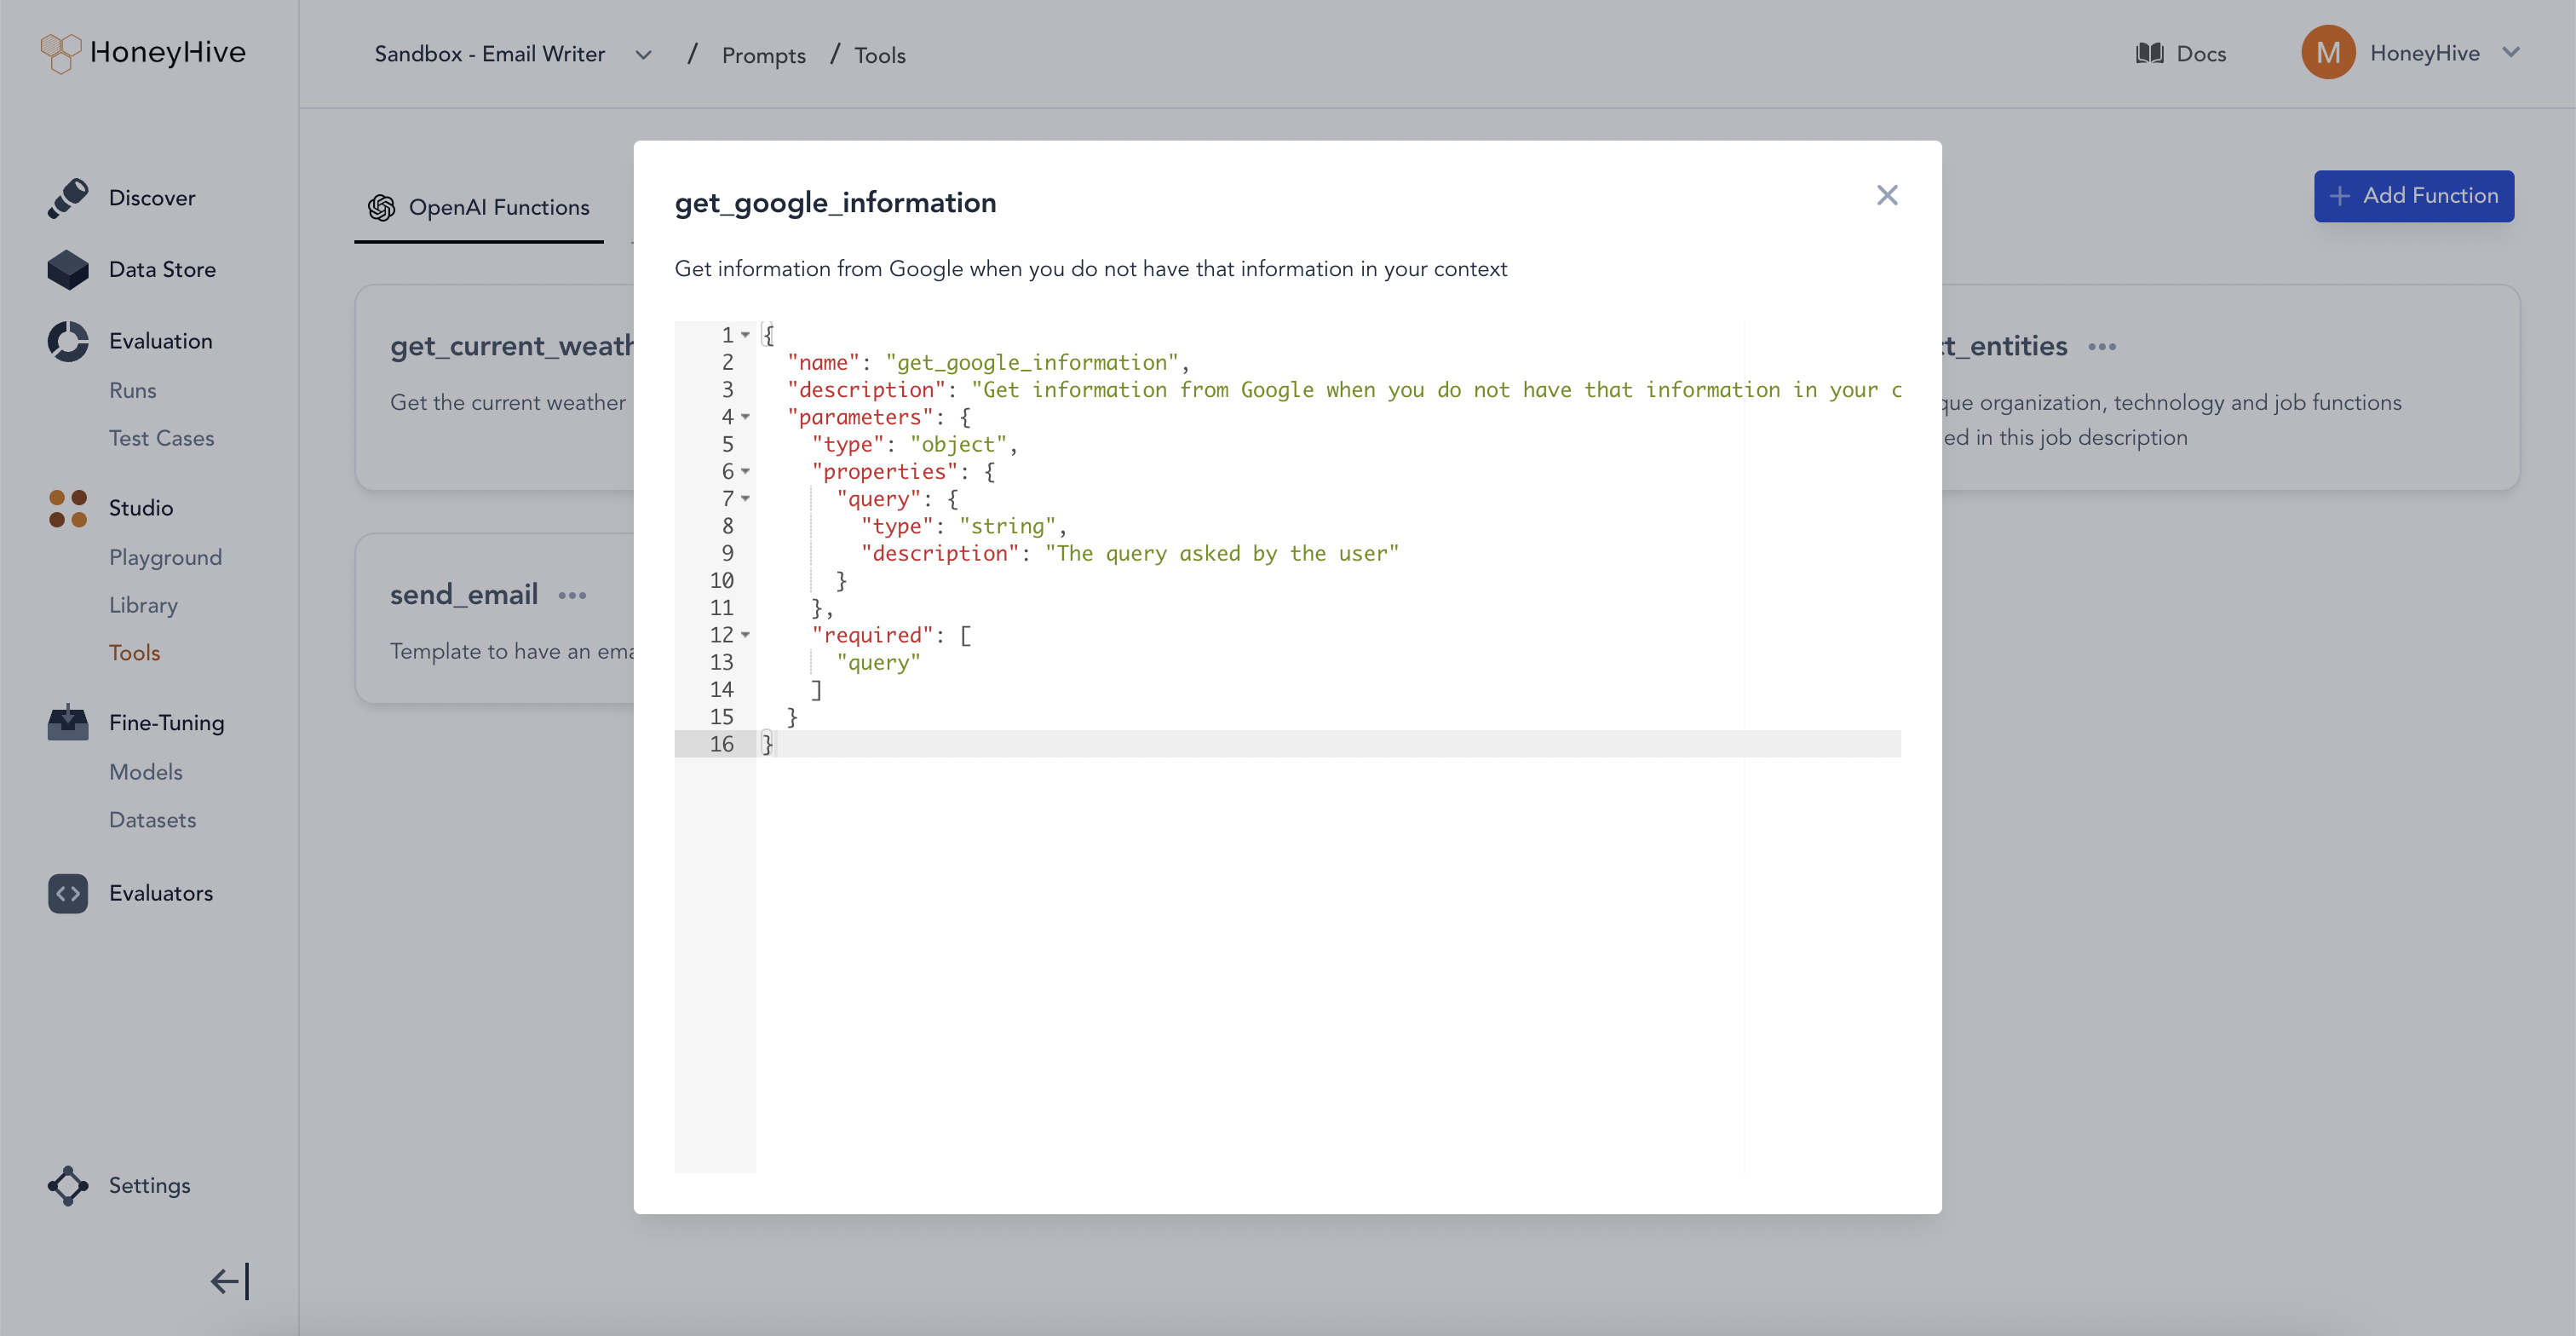 Learn more about OpenAI function schema [**here**](https://platform.openai.com/docs/guides/gpt/function-calling).
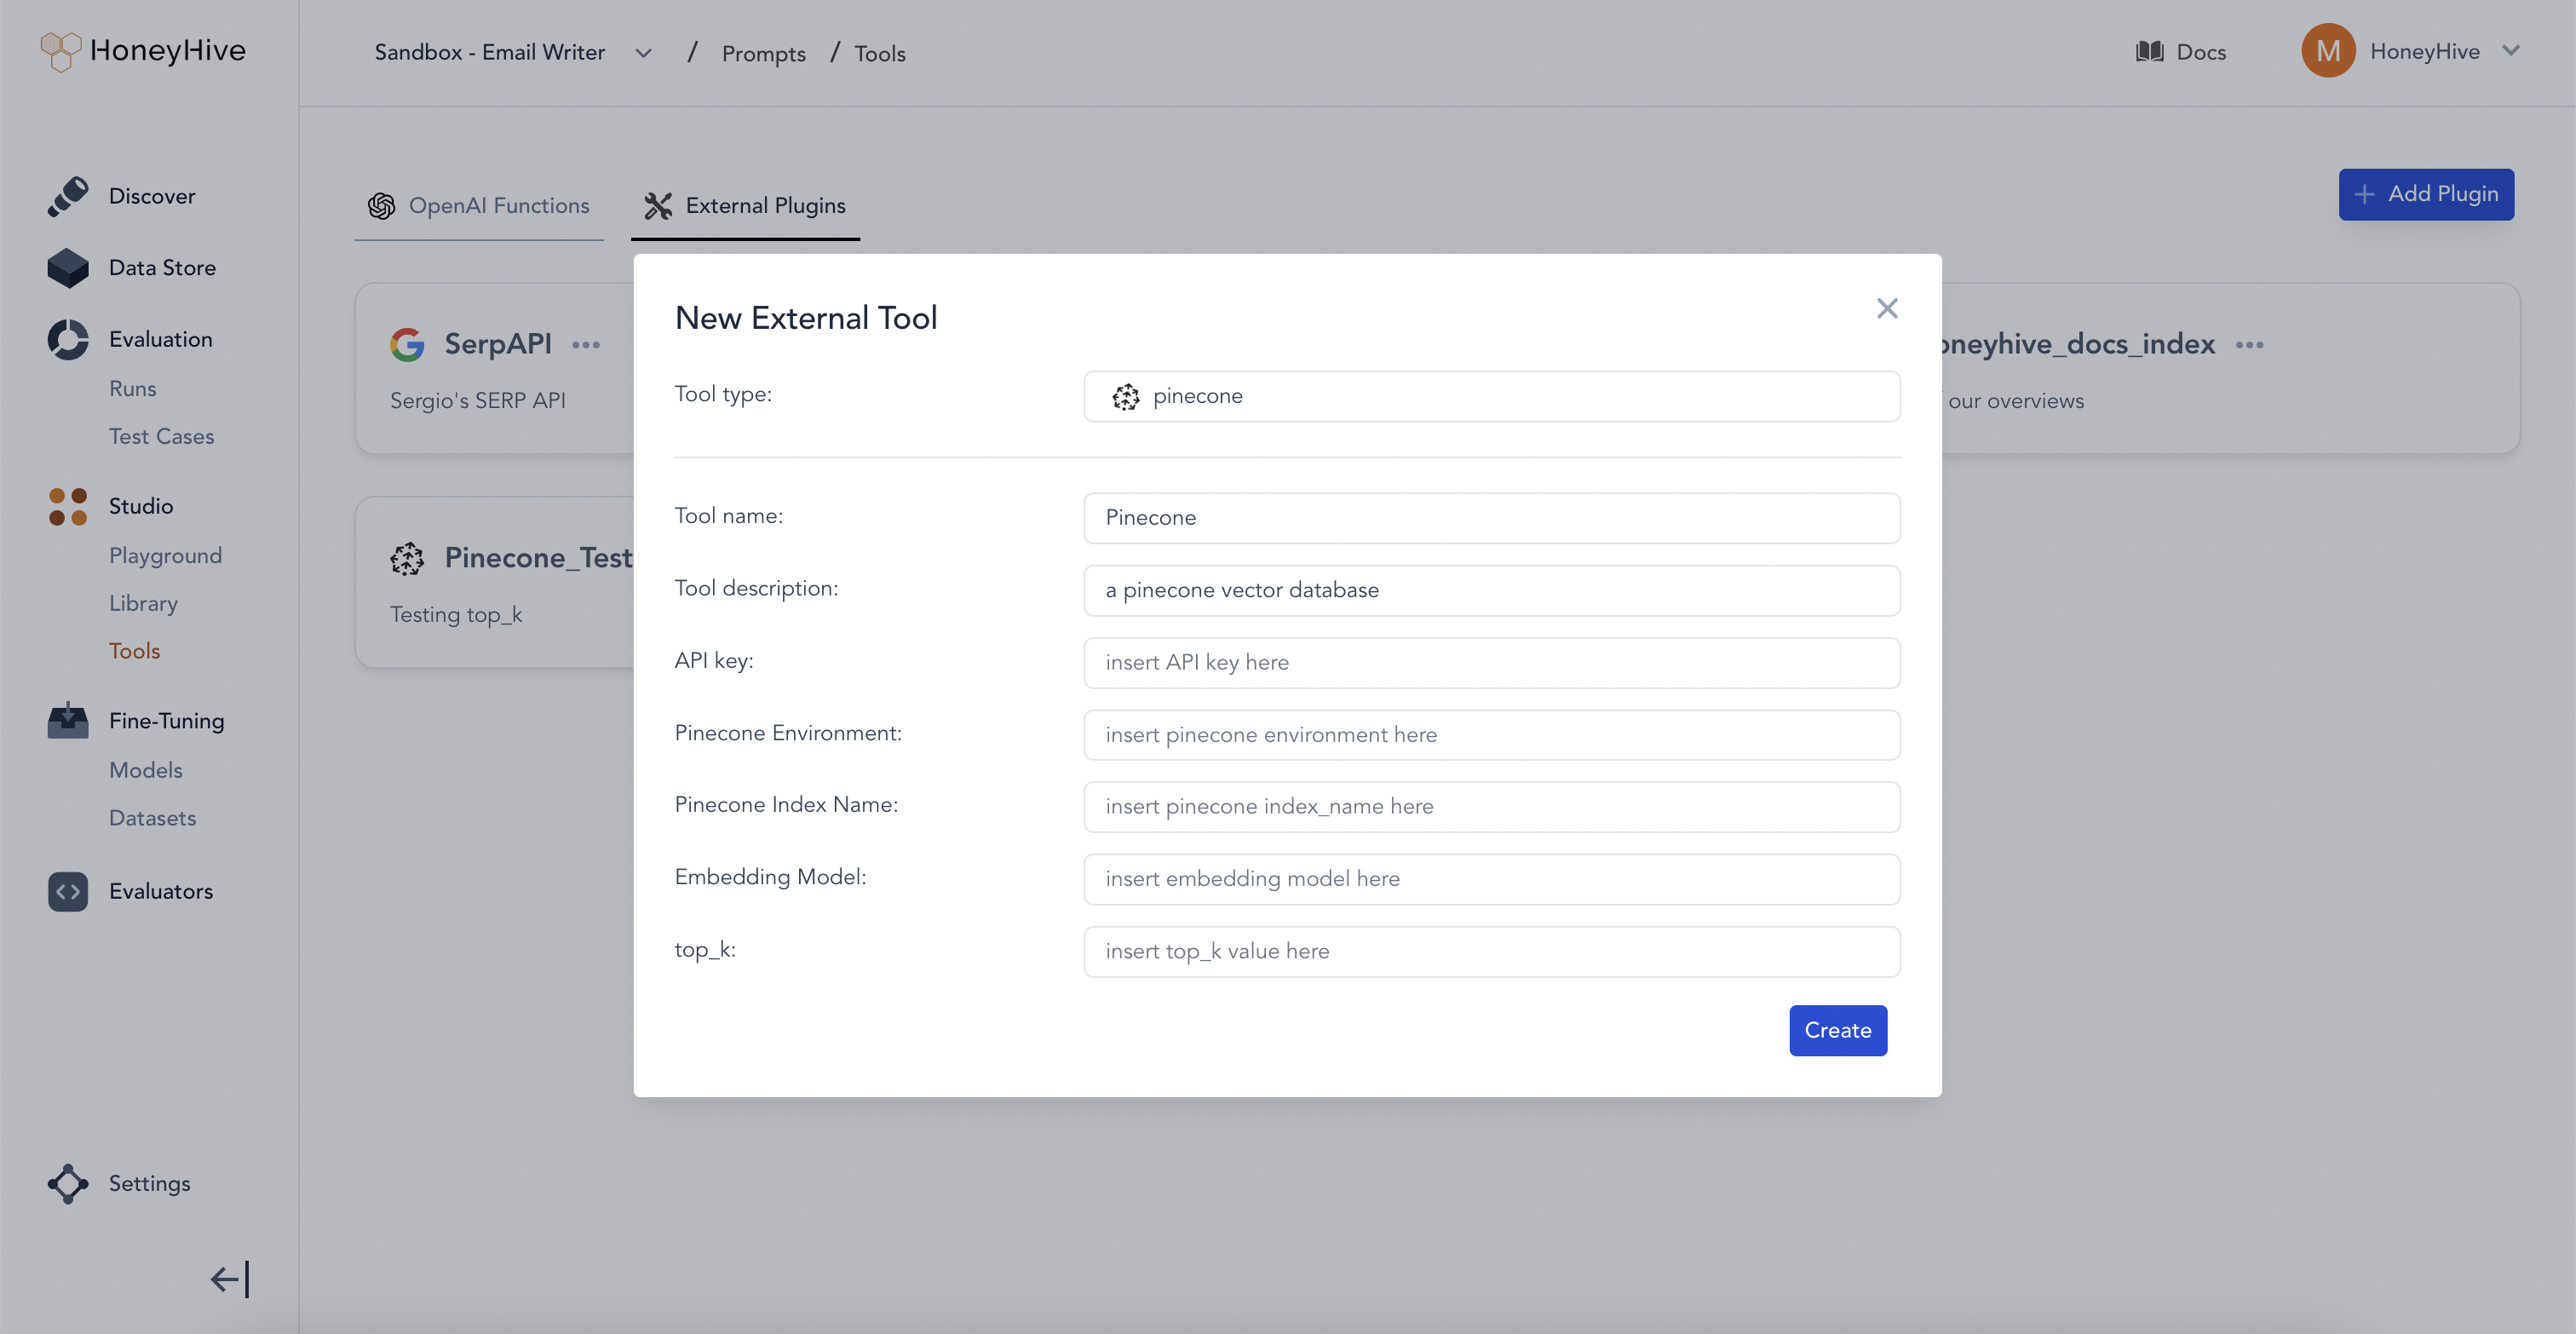
### Integrating Pinecone and SerpAPI
1. Navigate to [**Tools**](https://app.us.honeyhive.ai/studio/tools) in the left sidebar.
2. Click `Add Tool` and select `External Tool`.
3. Choose between SerpAPI and Pinecone in the dropdowns.
4. Add your API keys and other parameters specific to your Pinecone index.
Learn more about OpenAI function schema [**here**](https://platform.openai.com/docs/guides/gpt/function-calling).
### Integrating Pinecone and SerpAPI
1. Navigate to [**Tools**](https://app.us.honeyhive.ai/studio/tools) in the left sidebar.
2. Click `Add Tool` and select `External Tool`.
3. Choose between SerpAPI and Pinecone in the dropdowns.
4. Add your API keys and other parameters specific to your Pinecone index.
 ### Using External Tools in the Playground
1. You can access the [**Playground**](https://app.us.honeyhive.ai/studio/playground) within the **Prompts** tab in the left sidebar.
2. To use an external tool in your prompt template, copy the tool you'd like to select.
We use `/ToolName{{query_name}}` as the convention to call a tool.
3. Paste it in your prompt template and start using.
### What’s next
Now that you’ve defined some prompt configurations in the Playground, learn more about how to evaluate and monitor different prompt configurations using HoneyHive.
How to set up an evaluation harness and log runs in HoneyHive.
How to use monitor quality and performance metrics.
### Using External Tools in the Playground
1. You can access the [**Playground**](https://app.us.honeyhive.ai/studio/playground) within the **Prompts** tab in the left sidebar.
2. To use an external tool in your prompt template, copy the tool you'd like to select.
We use `/ToolName{{query_name}}` as the convention to call a tool.
3. Paste it in your prompt template and start using.
### What’s next
Now that you’ve defined some prompt configurations in the Playground, learn more about how to evaluate and monitor different prompt configurations using HoneyHive.
How to set up an evaluation harness and log runs in HoneyHive.
How to use monitor quality and performance metrics.