> ## Documentation Index
> Fetch the complete documentation index at: https://docs.honeyhive.ai/llms.txt
> Use this file to discover all available pages before exploring further.
# Annotation Queues
> Create HoneyHive annotation queues for human review of agent outputs, collect expert labels, and turn judgments into ground truth for evaluators.
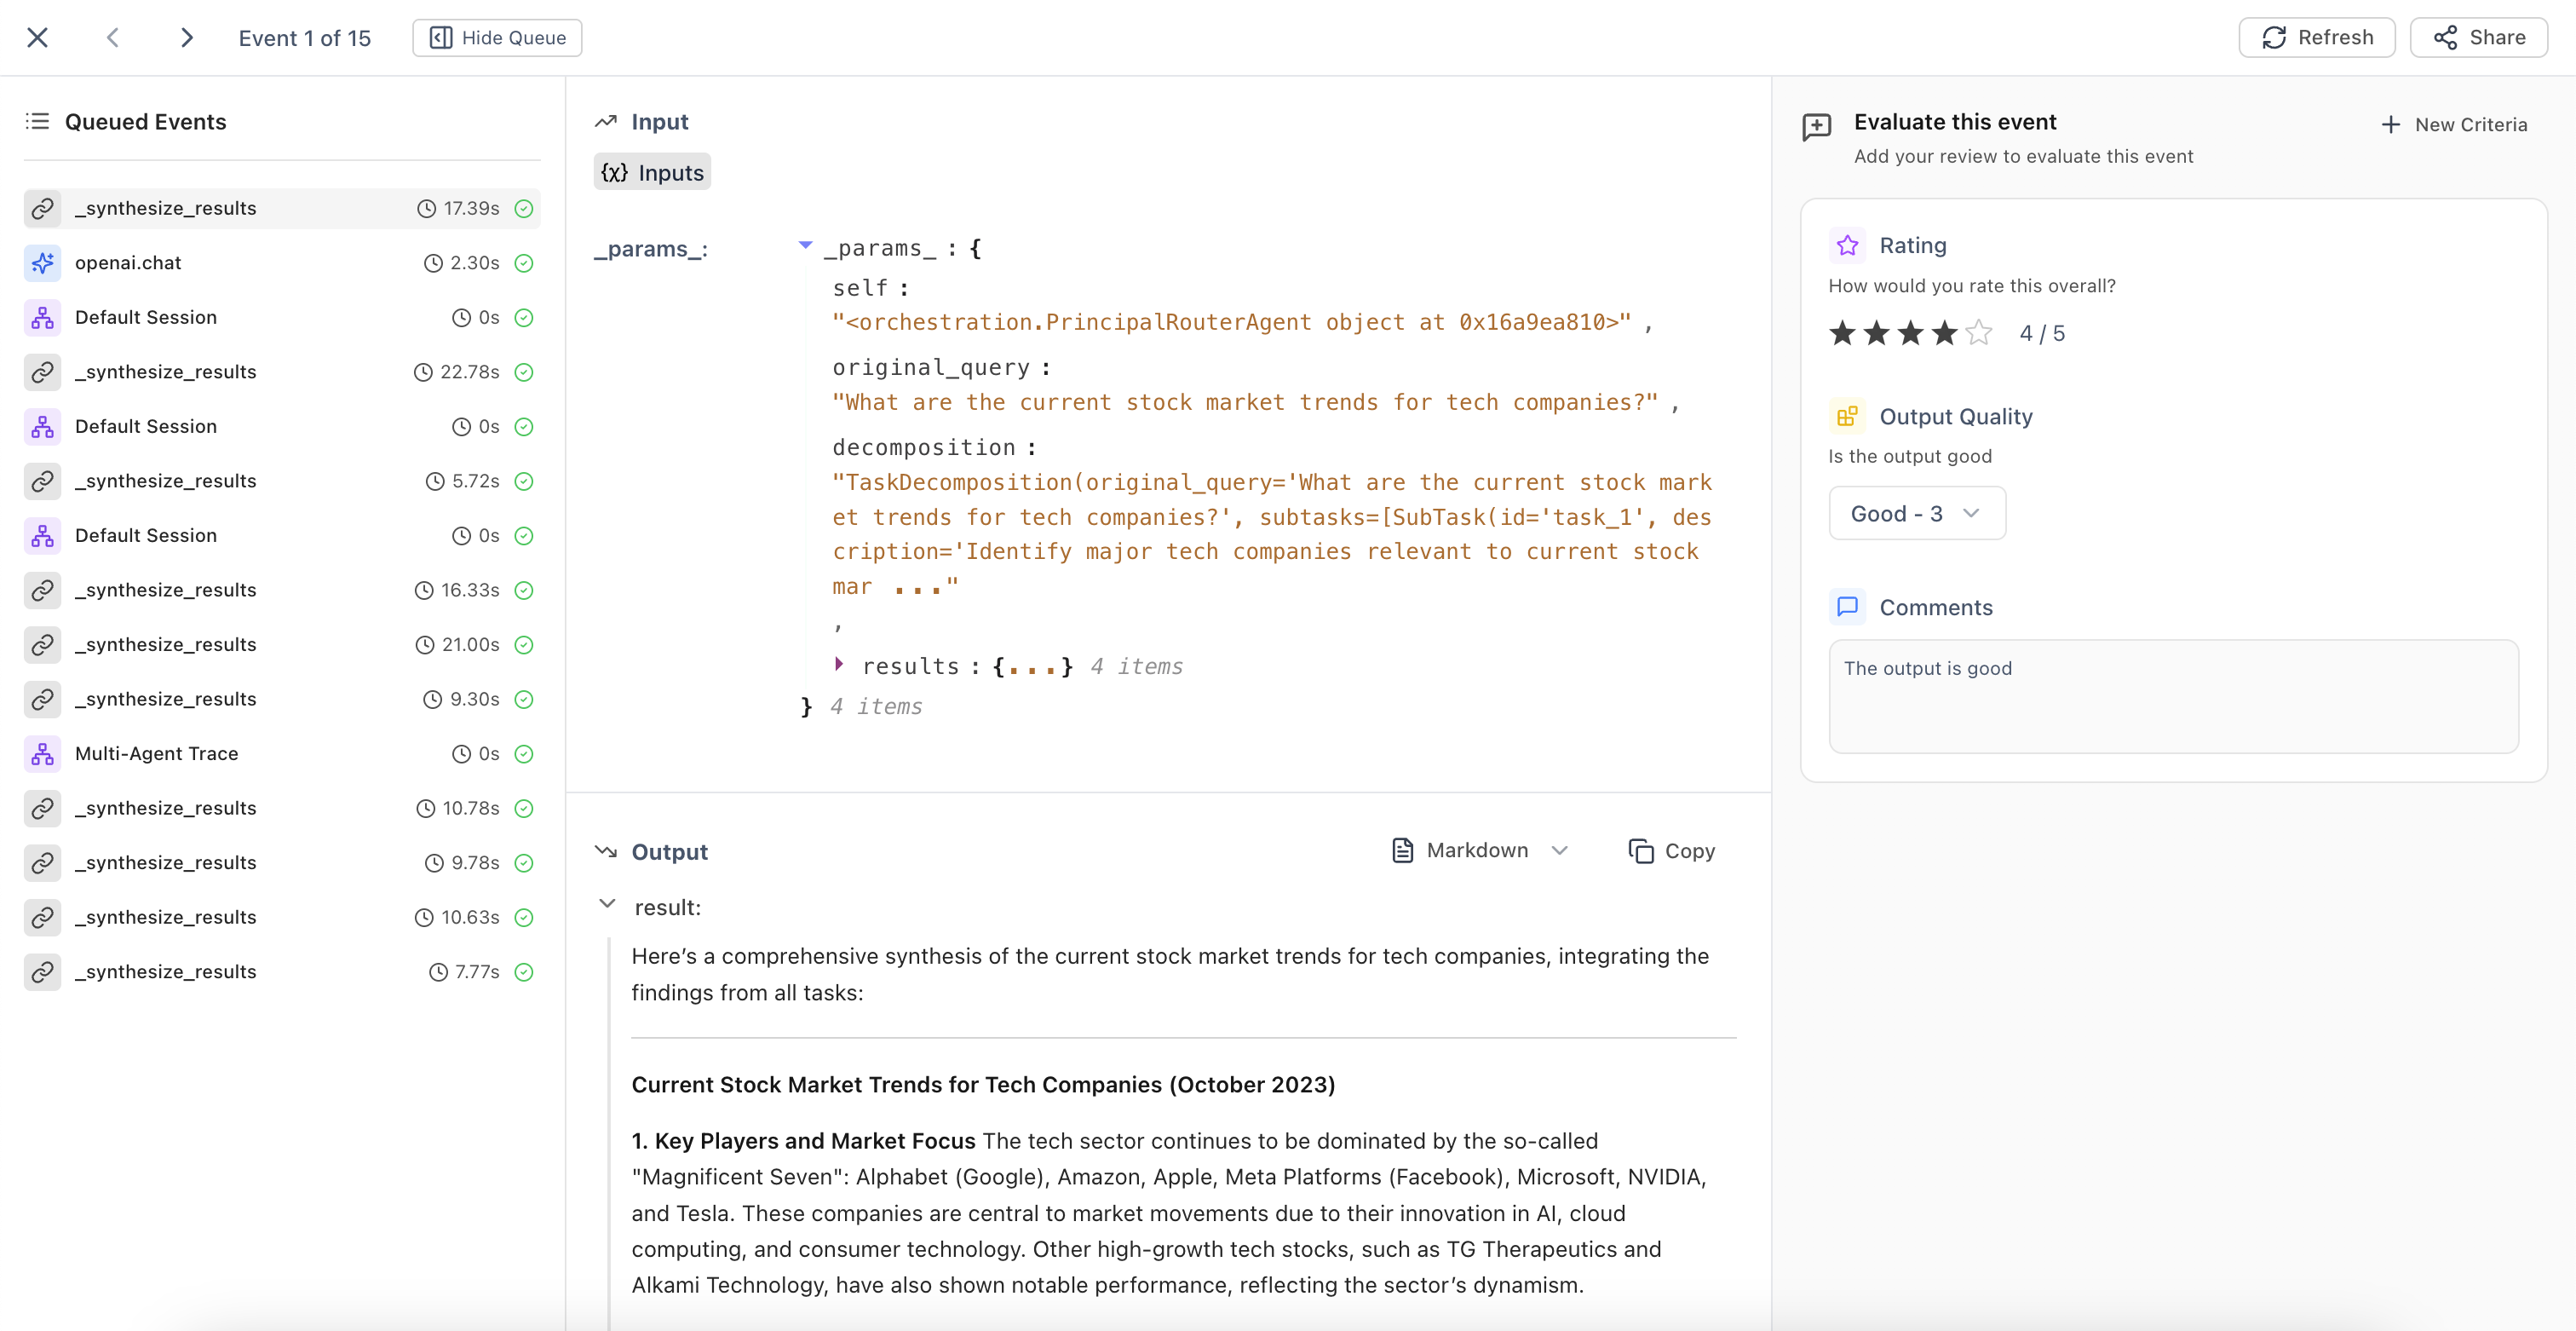
Annotation queues help you organize events for human review and quality assessment. Use them when subjective qualities like brand voice, creative quality, or domain-specific accuracy are best assessed by humans rather than automated evaluators.
**Before you start:** Create [Human Evaluators](/v2/evaluators/human) to define what fields your team will annotate (quality ratings, categories, feedback notes, etc.). Annotation queues organize **which** events to review; human evaluators define **what** to assess.
 ## When to Use Annotation Queues
Annotation queues are particularly useful for:
* **Quality Assurance** - Route low-confidence predictions or edge cases for human review
* **Active Learning** - Identify and label examples where your model is uncertain
* **Compliance Review** - Flag sensitive or regulated content for manual verification
* **Training Data Curation** - Collect and label examples to improve your datasets
* **Performance Monitoring** - Sample production traffic for ongoing quality assessment
## Creating Annotation Queues
Choose your approach based on your workflow:
| Create Method | When to Use |
| -------------------- | --------------------------------------------------------------------------- |
| **Manual Selection** | One-time review of specific edge cases or issues you've already identified |
| **Automated Rules** | Continuous quality monitoring with automatic sampling of production traffic |
### Manual Selection
Create a queue from specific events you've already identified. The Traces page provides three views for finding events: Sessions (complete traces), Completions (individual LLM calls), or All Events (every span).
1. Navigate to **Traces** in your project
2. Apply filters to identify the events you want to review
3. Select the events you want to include (or select all matching events)
4. Click the **Add to** dropdown menu
5. Select **Add to Queue**
## When to Use Annotation Queues
Annotation queues are particularly useful for:
* **Quality Assurance** - Route low-confidence predictions or edge cases for human review
* **Active Learning** - Identify and label examples where your model is uncertain
* **Compliance Review** - Flag sensitive or regulated content for manual verification
* **Training Data Curation** - Collect and label examples to improve your datasets
* **Performance Monitoring** - Sample production traffic for ongoing quality assessment
## Creating Annotation Queues
Choose your approach based on your workflow:
| Create Method | When to Use |
| -------------------- | --------------------------------------------------------------------------- |
| **Manual Selection** | One-time review of specific edge cases or issues you've already identified |
| **Automated Rules** | Continuous quality monitoring with automatic sampling of production traffic |
### Manual Selection
Create a queue from specific events you've already identified. The Traces page provides three views for finding events: Sessions (complete traces), Completions (individual LLM calls), or All Events (every span).
1. Navigate to **Traces** in your project
2. Apply filters to identify the events you want to review
3. Select the events you want to include (or select all matching events)
4. Click the **Add to** dropdown menu
5. Select **Add to Queue**
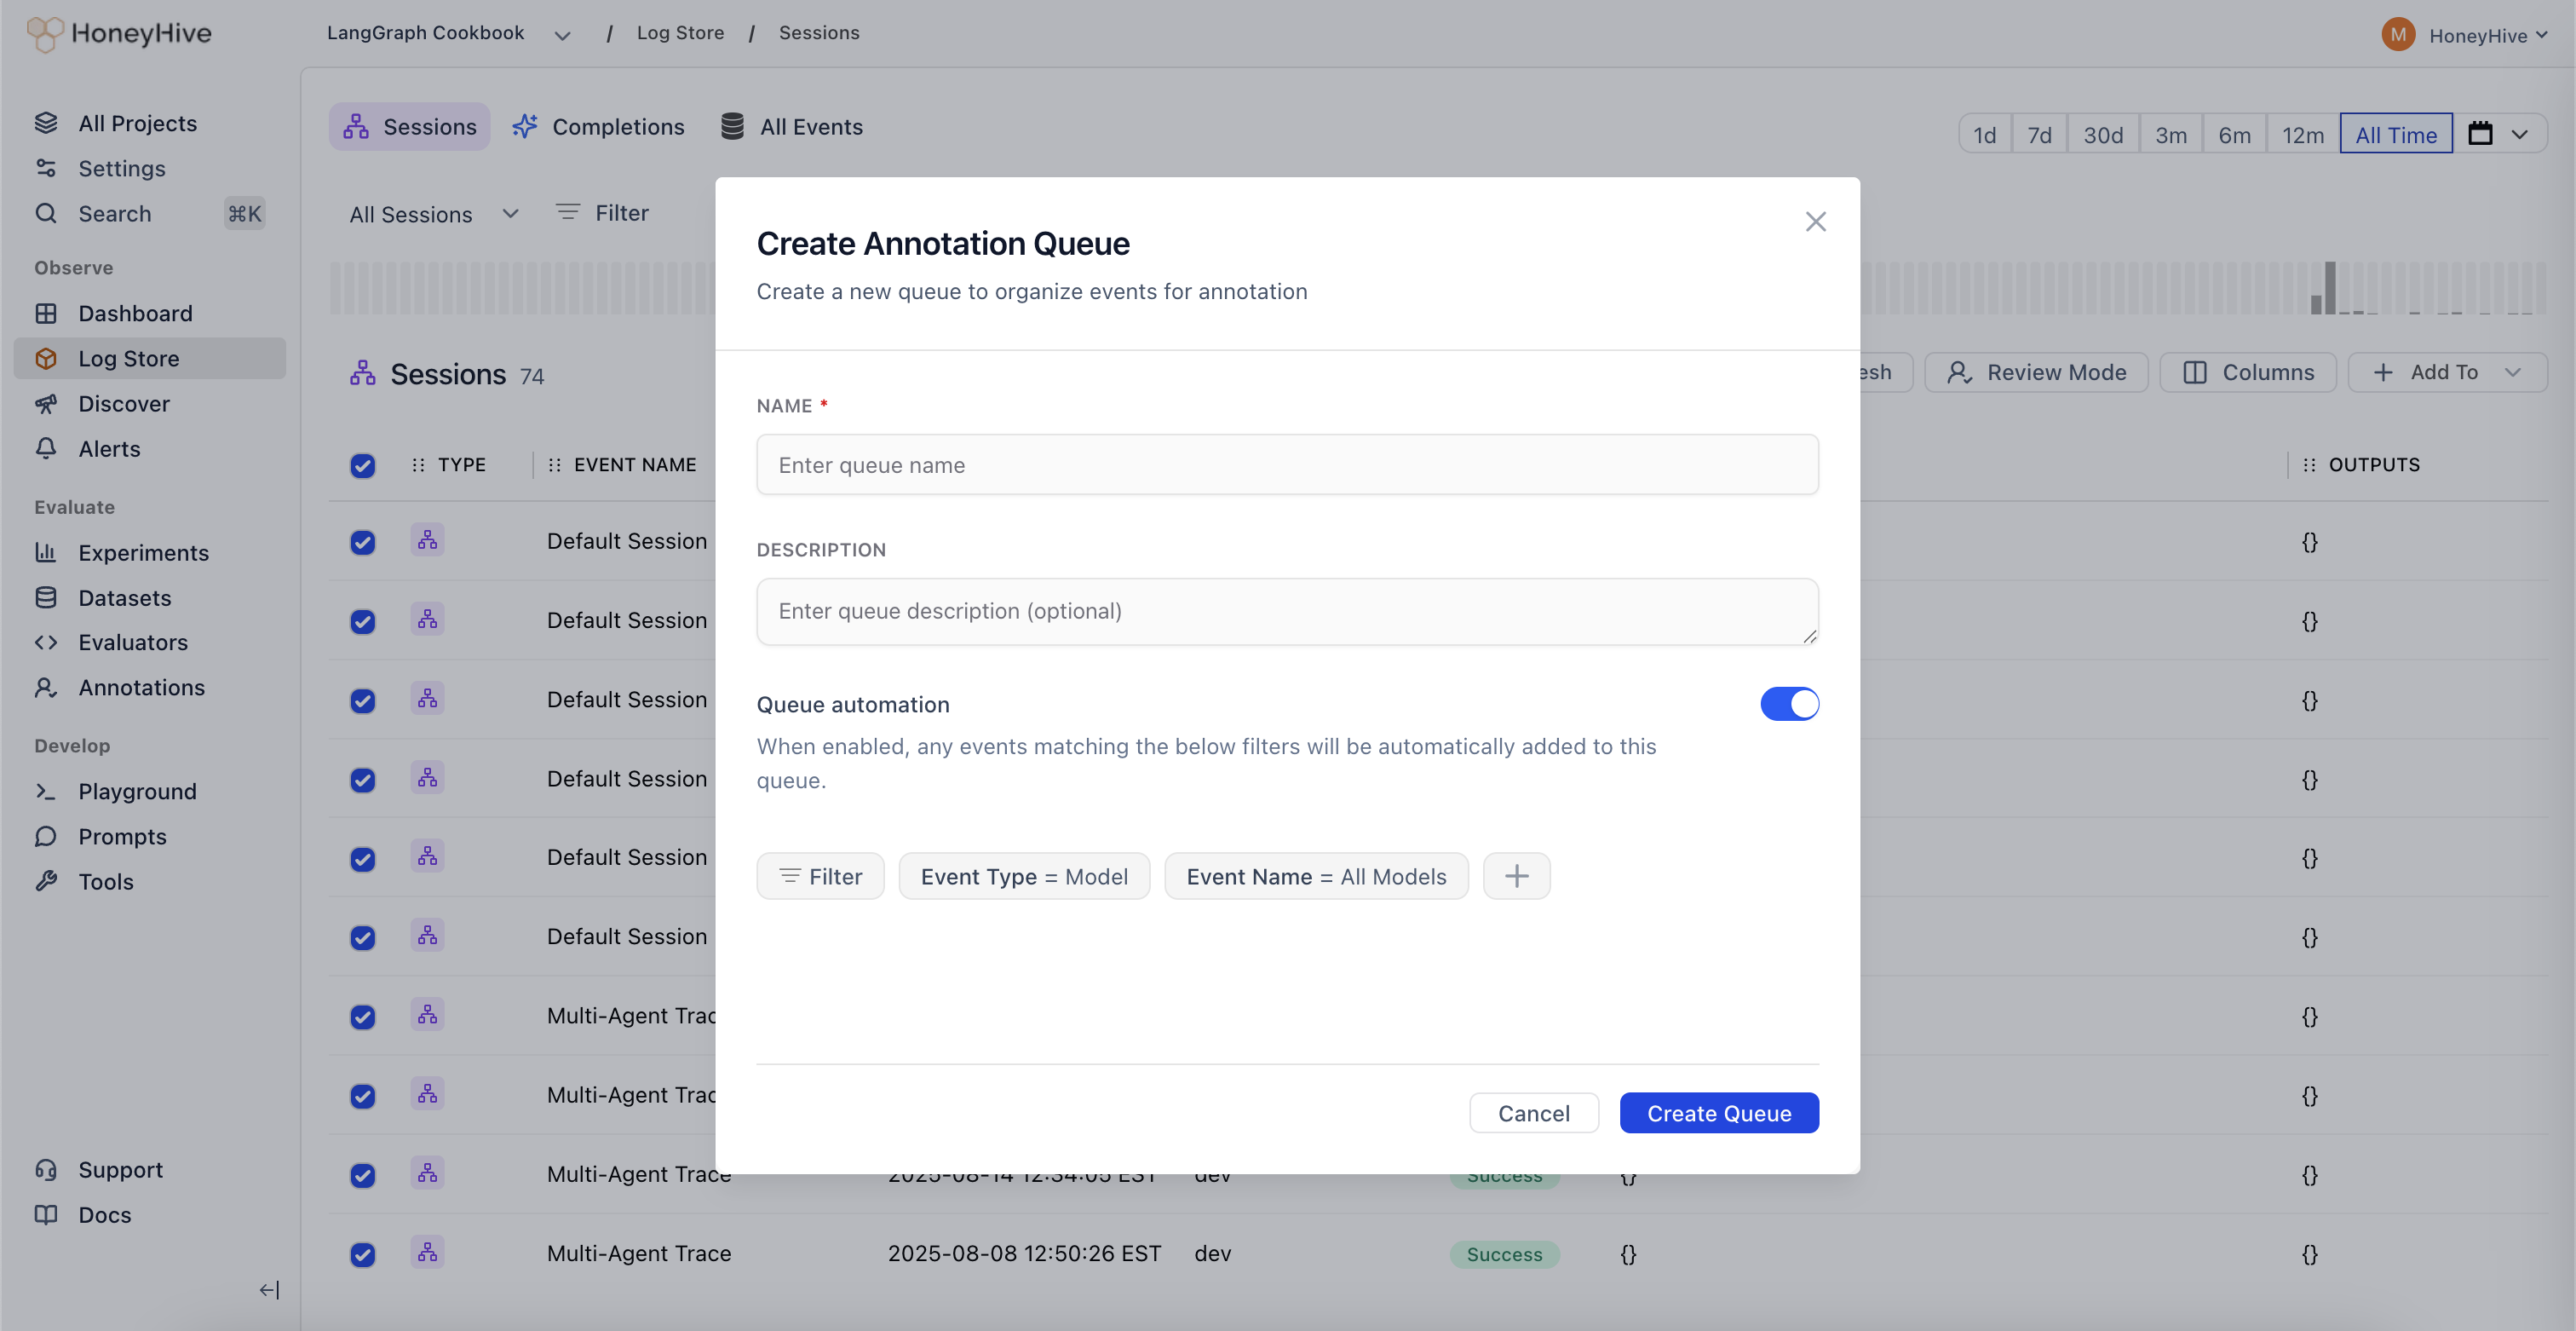 This approach is useful when you've identified specific events that need immediate attention.
### Automated Rules
Set up a queue that continuously captures matching events as they arrive:
**Option 1: From Traces**
1. Follow the manual selection steps above
2. After applying your filters, toggle the **Queue automation** checkbox when creating the queue
3. Your filters will be saved as automation rules
**Option 2: From Annotations Tab**
1. Navigate to the **Annotations** tab in your project
2. Click **Create Queue**
3. Set up your filter criteria to define which events should be automatically added
4. Toggle the **Queue automation** checkbox
5. Save your queue configuration
**How automation works:**
* New events matching your filters are automatically added in real-time
* You can edit filters and automation settings anytime by clicking on the queue
* Disable automation to pause capturing events without deleting the queue
### Common Filter Criteria
Filters determine which events are added to your queue. Common criteria include:
* **Event type** - Sessions, completions, tool calls, chains
* **Evaluator scores** - `metrics.accuracy < 0.7` or `metrics.toxicity > 0.5`
* **Metadata fields** - `metadata.environment = "production"`, `metadata.user_tier = "enterprise"`
* **User feedback** - `feedback.rating < 3` or `feedback.helpful = false`
* **Date ranges** - Last 7 days, specific time windows
* **Performance** - `duration > 5000`, `cost > 0.10`
For complete filter syntax and available operators, see [Query Trace Data](/v2/tracing/query-data#available-filter-operators).
## Reviewing and Annotating Events
Once events are in a queue:
1. Navigate to the **Annotations** tab in your project
2. Click on a queue to open Review Mode
3. For each event, view the inputs and outputs, then fill in the annotation fields defined by your human evaluators
4. Navigate between events:
* Right arrow (`→`) for next event
* Left arrow (`←`) for previous event
* `Enter` to save current annotations and advance
## Managing Queues
### Editing Queue Settings
Click on a queue to:
* Update the queue name and description
* Modify filter criteria (affects future auto-additions)
* Enable or disable automation
## Related
Create annotation fields before setting up queues
Learn about available filters for queue automation
Navigate Traces to select events manually
Understand how human evaluation fits in the evaluation workflow
This approach is useful when you've identified specific events that need immediate attention.
### Automated Rules
Set up a queue that continuously captures matching events as they arrive:
**Option 1: From Traces**
1. Follow the manual selection steps above
2. After applying your filters, toggle the **Queue automation** checkbox when creating the queue
3. Your filters will be saved as automation rules
**Option 2: From Annotations Tab**
1. Navigate to the **Annotations** tab in your project
2. Click **Create Queue**
3. Set up your filter criteria to define which events should be automatically added
4. Toggle the **Queue automation** checkbox
5. Save your queue configuration
**How automation works:**
* New events matching your filters are automatically added in real-time
* You can edit filters and automation settings anytime by clicking on the queue
* Disable automation to pause capturing events without deleting the queue
### Common Filter Criteria
Filters determine which events are added to your queue. Common criteria include:
* **Event type** - Sessions, completions, tool calls, chains
* **Evaluator scores** - `metrics.accuracy < 0.7` or `metrics.toxicity > 0.5`
* **Metadata fields** - `metadata.environment = "production"`, `metadata.user_tier = "enterprise"`
* **User feedback** - `feedback.rating < 3` or `feedback.helpful = false`
* **Date ranges** - Last 7 days, specific time windows
* **Performance** - `duration > 5000`, `cost > 0.10`
For complete filter syntax and available operators, see [Query Trace Data](/v2/tracing/query-data#available-filter-operators).
## Reviewing and Annotating Events
Once events are in a queue:
1. Navigate to the **Annotations** tab in your project
2. Click on a queue to open Review Mode
3. For each event, view the inputs and outputs, then fill in the annotation fields defined by your human evaluators
4. Navigate between events:
* Right arrow (`→`) for next event
* Left arrow (`←`) for previous event
* `Enter` to save current annotations and advance
## Managing Queues
### Editing Queue Settings
Click on a queue to:
* Update the queue name and description
* Modify filter criteria (affects future auto-additions)
* Enable or disable automation
## Related
Create annotation fields before setting up queues
Learn about available filters for queue automation
Navigate Traces to select events manually
Understand how human evaluation fits in the evaluation workflow