Before you start: Create Human Evaluators to define what fields your team will annotate (quality ratings, categories, feedback notes, etc.). Annotation queues organize which events to review; human evaluators define what to assess.
When to Use Annotation Queues
Annotation queues are particularly useful for:- Quality Assurance - Route low-confidence predictions or edge cases for human review
- Active Learning - Identify and label examples where your model is uncertain
- Compliance Review - Flag sensitive or regulated content for manual verification
- Training Data Curation - Collect and label examples to improve your datasets
- Performance Monitoring - Sample production traffic for ongoing quality assessment
Creating Annotation Queues
Choose your approach based on your workflow:| Create Method | When to Use |
|---|---|
| Manual Selection | One-time review of specific edge cases or issues you’ve already identified |
| Automated Rules | Continuous quality monitoring with automatic sampling of production traffic |
Manual Selection
Create a queue from specific events you’ve already identified. The Log Store provides three views for finding events: Sessions (complete traces), Completions (individual LLM calls), or All Events (every span).- Navigate to the Log Store in your project
- Apply filters to identify the events you want to review
- Select the events you want to include (or select all matching events)
- Click the Add to dropdown menu
- Select Add to Queue

Automated Rules
Set up a queue that continuously captures matching events as they arrive: Option 1: From Log Store- Follow the manual selection steps above
- After applying your filters, toggle the Queue automation checkbox when creating the queue
- Your filters will be saved as automation rules
- Navigate to the Annotations tab in your project
- Click Create Queue
- Set up your filter criteria to define which events should be automatically added
- Toggle the Queue automation checkbox
- Save your queue configuration
- New events matching your filters are automatically added in real-time
- You can edit filters and automation settings anytime by clicking on the queue
- Disable automation to pause capturing events without deleting the queue
Common Filter Criteria
Filters determine which events are added to your queue. Common criteria include:- Event type - Sessions, completions, tool calls, chains
- Evaluator scores -
metrics.accuracy < 0.7ormetrics.toxicity > 0.5 - Metadata fields -
metadata.environment = "production",metadata.user_tier = "enterprise" - User feedback -
feedback.rating < 3orfeedback.helpful = false - Date ranges - Last 7 days, specific time windows
- Performance -
duration > 5000,cost > 0.10
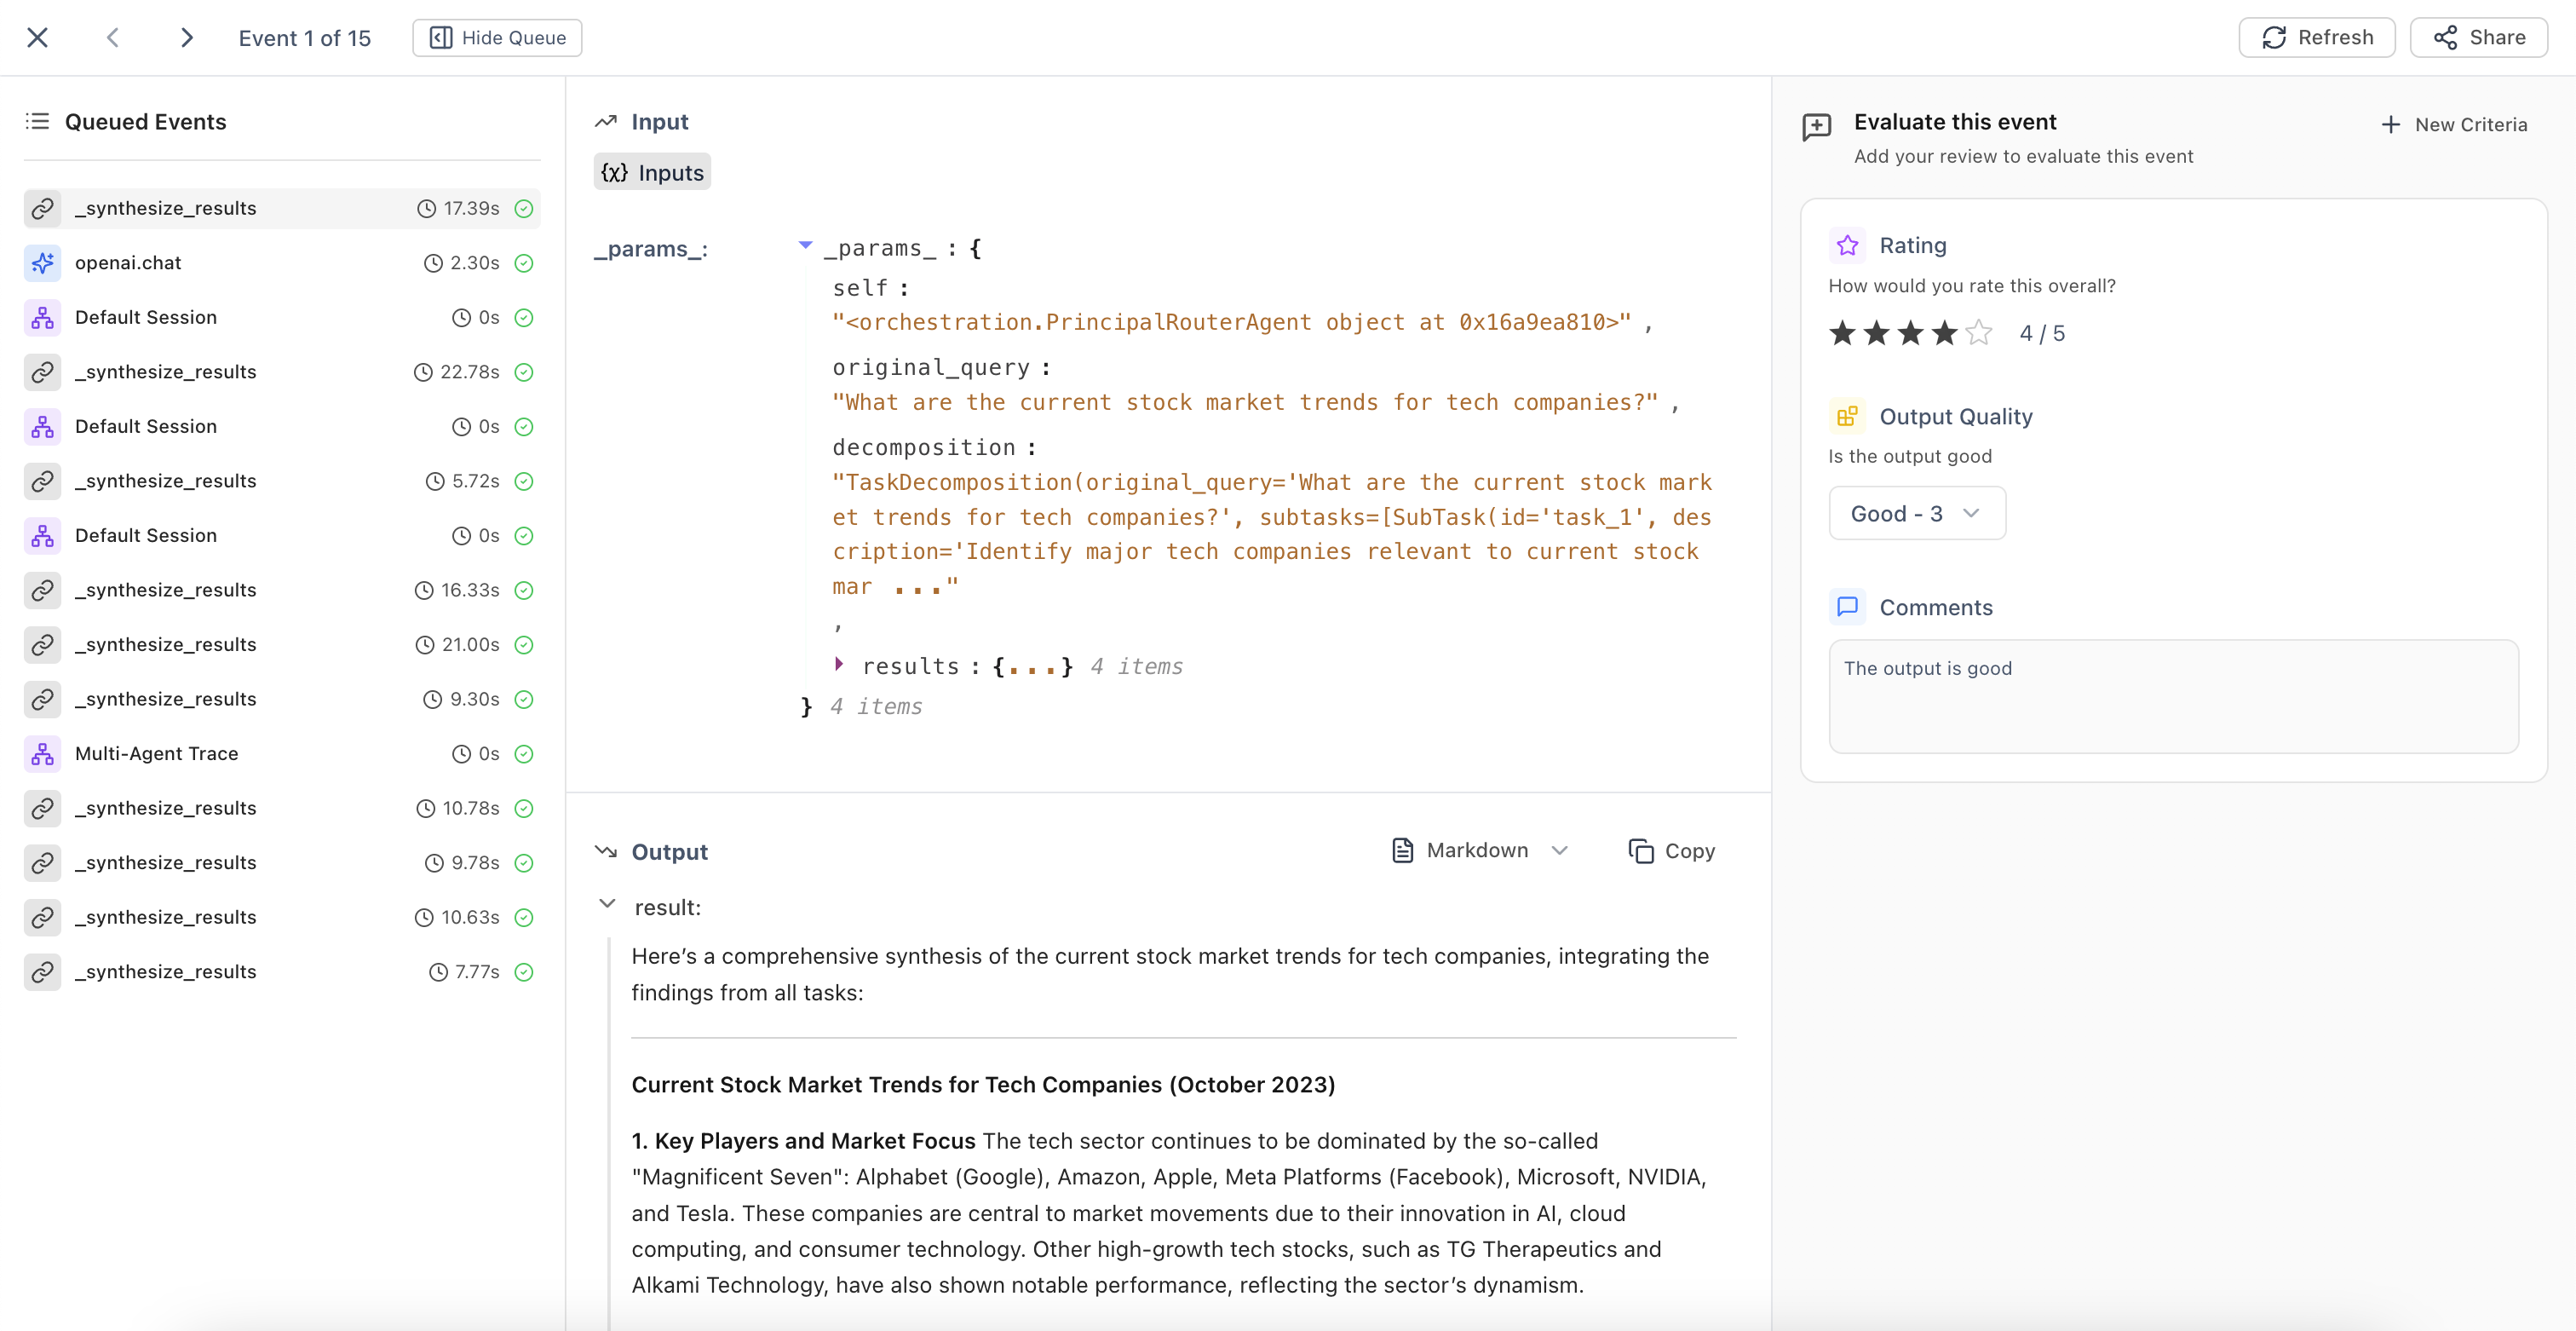
Reviewing and Annotating Events
Once events are in a queue:- Navigate to the Annotations tab in your project
- Click on a queue to open Review Mode
- For each event, view the inputs and outputs, then fill in the annotation fields defined by your human evaluators
- Navigate between events:
- Right arrow (
→) for next event - Left arrow (
←) for previous event Enterto save current annotations and advance
- Right arrow (
Managing Queues
Editing Queue Settings
Click on a queue to:- Update the queue name and description
- Modify filter criteria (affects future auto-additions)
- Enable or disable automation